Wi-Fi R-Mesh Provisioning
In practical applications, certain R-Mesh nodes (such as smart light bulbs) may not have input devices like touchscreens or keyboards, and therefore cannot join a WLAN by directly entering the SSID and password. Such nodes can join a WLAN using either of the following two provisioning methods:
Method 1: Assisted Provisioning
Using a mobile app ( MGravitation ), the WLAN password is sent via Bluetooth to the R-Mesh node to be provisioned. As shown in the figure, the main steps are:

Assisted Provisioning
The smartphone establishes a Bluetooth connection with the R-Mesh node.
The connected R-Mesh node scans nearby WLANs and sends the list of detected WLAN SSIDs to the smartphone via Bluetooth for display.
The user selects the WLAN for the R-Mesh node to join on the smartphone and enters its password. The smartphone then sends the WLAN SSID and password to the R-Mesh node via Bluetooth.
The R-Mesh node uses the received SSID and password to join the WLAN.
Method 2: ZRPP Provisioning
The R-Mesh node to be provisioned can detect nearby, already network-connected R-Mesh nodes by scanning WLAN channels. If any are found, it can automatically query those nodes for the SSID and password of their WLAN using the Zero R-Mesh Provisioning Protocol (ZRPP), and then join that WLAN.
Note
“Zero” refers to “zero touch”, meaning this provisioning method requires no manual input from the user. It is fully automated by the R-Mesh nodes and can greatly reduce provisioning time when many nodes need to be provisioned.
The main steps of ZRPP are as follows:

Zero R-Mesh Provisioning Protocol (ZRPP)
The R-Mesh node to be provisioned scans all WLAN channels in sequence. If it detects a network-connected R-Mesh node on a particular channel, it immediately stops scanning and remains on that channel.
The node to be provisioned sends a ZRPP request (a WLAN data frame with a specific format) to the discovered network-connected R-Mesh node.
The network-connected R-Mesh node responds with a ZRPP response (a WLAN data frame with a specific format) containing the WLAN SSID and password.
The R-Mesh node to be provisioned uses the received SSID and password to join the WLAN.
Example Demonstration
This section demonstrates how to establish an R-Mesh network using the provisioning method.
The source code for this example can be found at: wifi_rpp
General Provisioning Workflow (as in this case) consists of two phases:
Phase I (assisted provisioning): Use the mobile visualization tool ( MGravitation ) to perform assisted provisioning for one R-Mesh node.
Phase II (ZRPP): Using the node provisioned in Phase I, The remaining R-Mesh nodes automatically join the network via ZRPP.
Through this example, you will learn the provisioning workflow and how to use MGravitation; you can also refer to this case to redevelop your own application.
Compilation and Flashing
Configure parameters via the Wi-Fi User Configuration File :
wifi_user_config.fast_reconnect_en = 0;
Enable R-Mesh and Socket
Set up the compilation environment, and run
ameba.py menuconfigto access the configuration interface, then configure as follows:
----Connectivity config----
CONFIG WHC INTF  --->
...
CONFIG BT  --->
   [*] Enable BT
   [ ]     BT Advanced Feature (NEW)
   [*]     BT Example Demo
   [ ]         BLE Peripheral (NEW)
   ...
   [ ]         BLE Transfer Module (NEW)
   [*]         BLE WiFiMate Device
   [*]         BLE WiFiMate Configurator
   [ ]         BLE OTA Central (NEW)
   ...
Run
ameba.py build -a wifi_rppRefer to Standard Procedure to flash firmware to the nodes
Phase I: Assisted Provisioning
Note
Before the experiment, make sure the phone’s Bluetooth is turned on and the phone’s Wi‑Fi is connected to the AP.
First power on all R‑Mesh nodes together, then open the MGravitation app; the phone will scan all nearby R‑Mesh nodes via Bluetooth and display a list of R‑Mesh nodes:
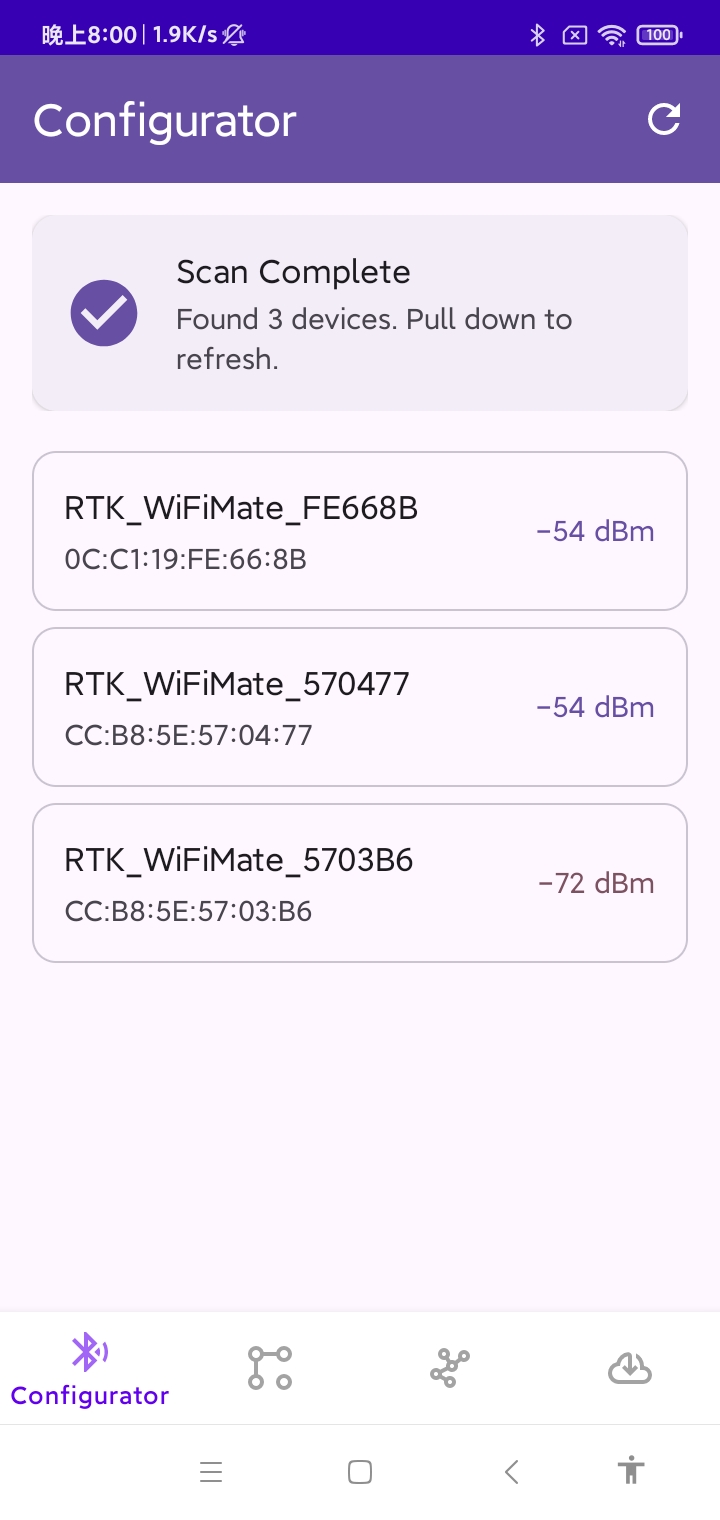
List of R‑Mesh nodes discovered by MGravitation
After selecting one node, the phone establishes a Bluetooth connection with it and commands the node to perform a WLAN scan. The scanned SSID list is returned over the Bluetooth link and shown on the phone:
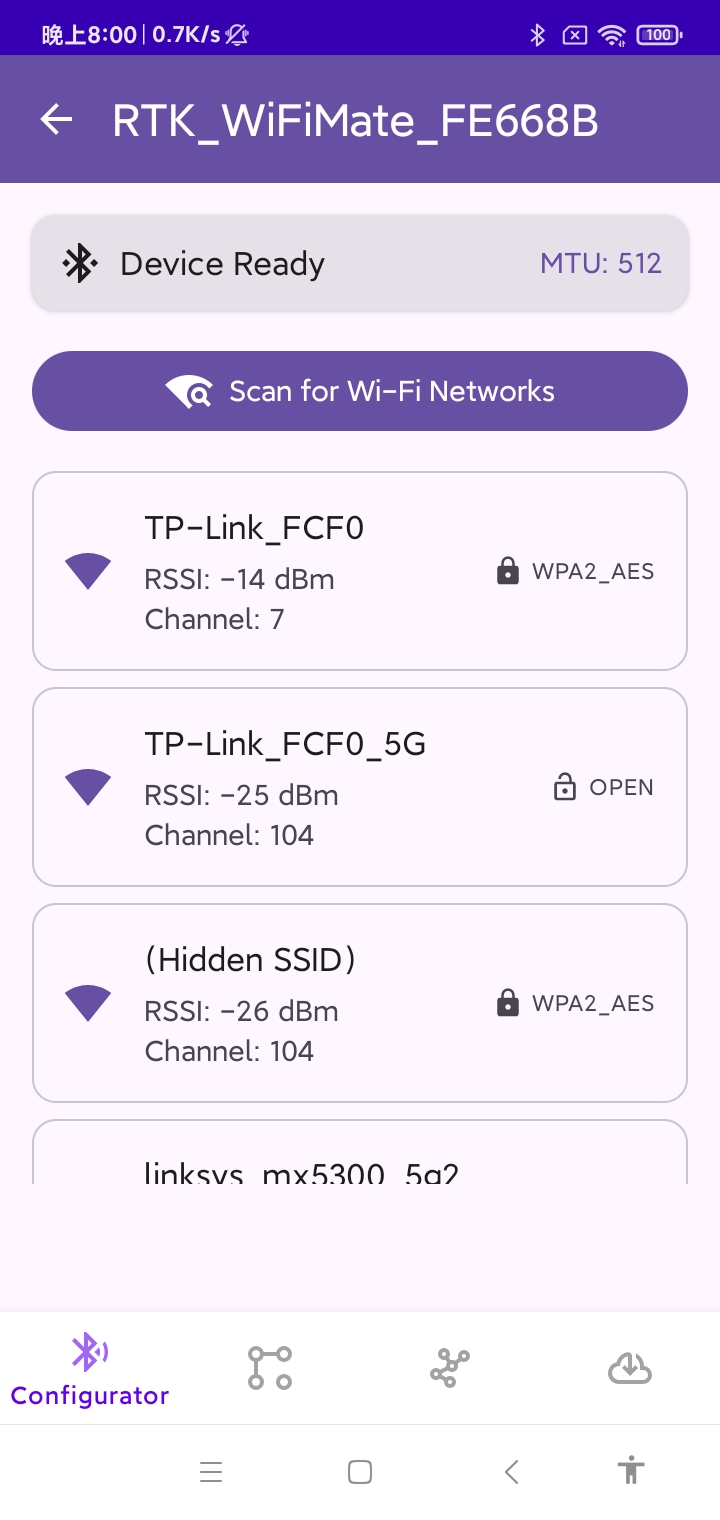
WLAN SSID list scanned by the R‑Mesh node
Next, select the target WLAN SSID, enter the password, and tap “Connect”:
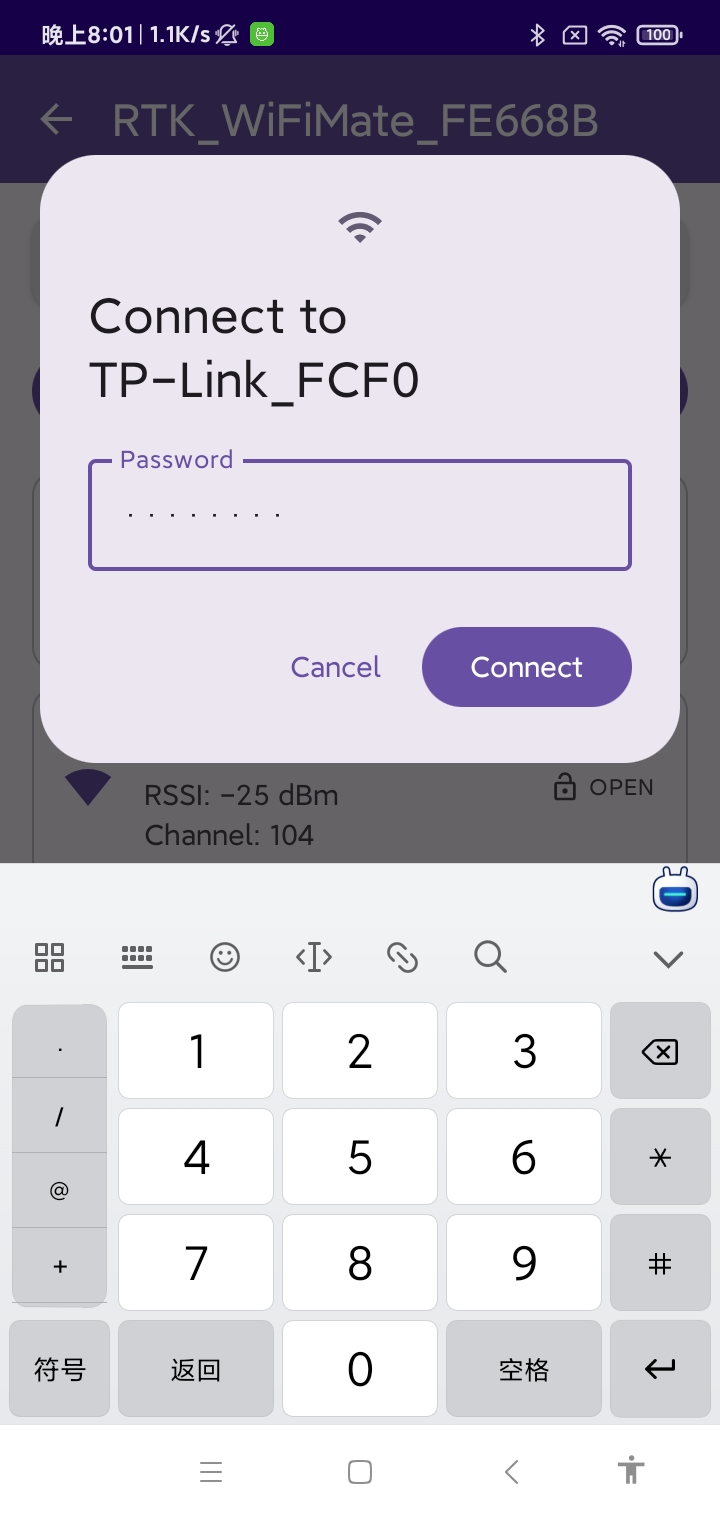
MGravitation instructs the R‑Mesh node to connect to the target WLAN
After a short while, the R‑Mesh node successfully connects to the WLAN:
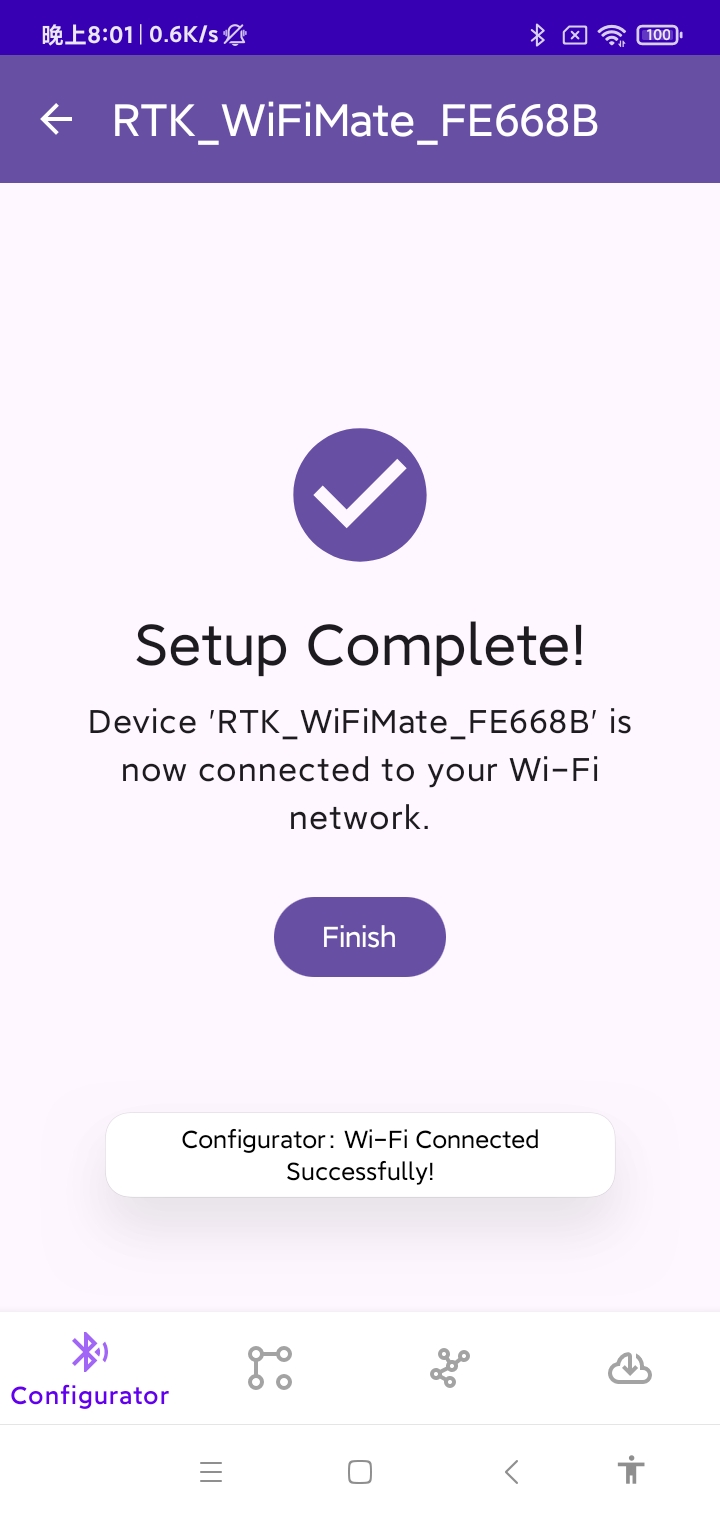
R‑Mesh node successfully connected to WLAN via MGravitation
Phase II: ZRPP
Other R‑Mesh nodes, upon detecting that the first node has connected successfully, will automatically connect to the WLAN via ZRPP. This process requires no user intervention. After a short period, the topology view will show that all R‑Mesh nodes have successfully connected to the WLAN.

All R-Mesh nodes successfully connected to the WLAN via ZRPP
