AI Training Server User Guide
Introduction to AI Training Server
The AI Training Server provides a one-stop conversion and training workflow that can be used as an alternative to the offline Acuity Toolkit. It provides a web-based user interface for dataset management, model training, quantization, and deployment.
For a complete guide on setting up and using the AI Training Server, including hardware requirements, installation steps, and the full training workflow, please refer to:
Key Features
Web-based UI: Manage datasets, configure training, and download converted models through a browser interface.
End-to-end workflow: From dataset import to trained and quantized model (
.nbfiles).Auto-labeling: Automatically generate labels for your dataset.
Quantization comparison: Compare FP32 and INT8 model accuracy before deployment.
Built-in simulator: Test your model directly in the server environment.
Requirements
Note
The AI Training Server has the following requirements:
It requires a native Ubuntu environment with an NVIDIA GPU. (Ubuntu 24.04 is recommended.)
WSL is not supported.
Only one training job can run at a time due to single GPU limitation.
For more details, see AI Training Server Setup Guide and AI Training Server Run Guide.
AI Training Server Setup Guide
Note
To set up, it requires executing several commands. The process has been packaged into Docker, so you only need to import the Docker image to get started.
S1. Hardware Requirements
Ubuntu OS system with NVIDIA GPU (recommended version: Ubuntu 24.04)
32 GB DRAM
NVIDIA 4060 8 GB VRAM (or above)
Note
The AI Training Server does not support installation or execution on WSL (Windows Subsystem for Linux). A native Ubuntu environment with NVIDIA GPU support is required.
S2. NVIDIA Driver Installation
Open Software & Updates
Navigate to the Additional Drivers tab
Select the driver labeled “proprietary, tested” (e.g.,
nvidia-driver-560)Click Apply Changes and reboot
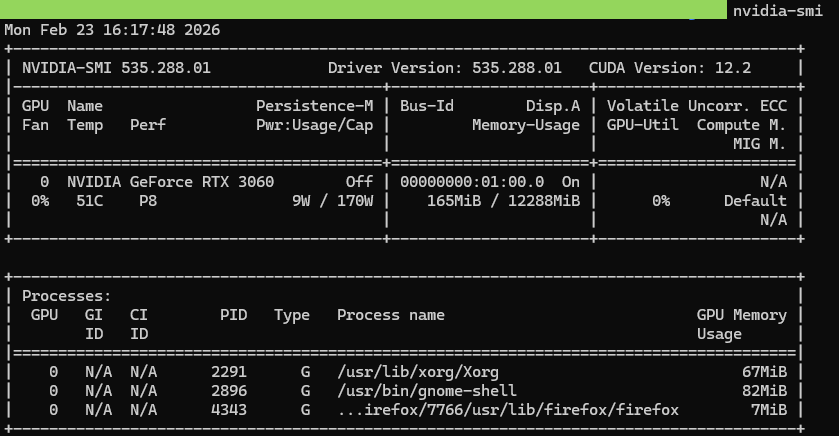
After rebooting, verify the installation by running
nvidia-smi
S3. Docker Installation
Follow the instructions from: https://docs.docker.com/engine/install/ubuntu/
Add your user to the Docker group and reboot:
sudo usermod -aG docker $USER
Use
docker psto verify the installation.
S4. Create Working Directory
Create a folder for the scripts and .tar.gz files (e.g., AI_train_server).
The folder structure will be similar to:
AI_train_server/
|-- docker_images/
|   |-- IMAGES.txt                               --> docker images list
|   |-- load_docker_images.sh                    --> installation script
|   |-- acuity_converter_v1.1.tar.gz             --> docker image file
|   |-- training-server-train_latest.tar.gz      --> docker image file
|   |-- training-server-importer_latest.tar.gz   --> docker image file
|   |-- nvidia_cuda_12.1.1-cudnn8-runtime-ubuntu22.04.tar.gz  --> docker image file
|-- base
|-- base-20260109-165208.tar.gz
|-- workspaces_example
|-- workspaces-example-20251223-135111.tar.gz
|-- INSTALLATION.md
S5. Install the Scripts
tar -xzf base-<timestamp>.tar.gz
tar -xzf workspaces-example-<timestamp>.tar.gz
cd docker_images && ./load_docker_images.sh
cd ../base
sudo ./install.sh
cd ../workspaces_example && ./install_workspaces_example.sh   (optional, generate default example)
S6. Login to the System
After installation, there will be a shortcut on the desktop, or you can log in
by visiting http://localhost:8080/login.
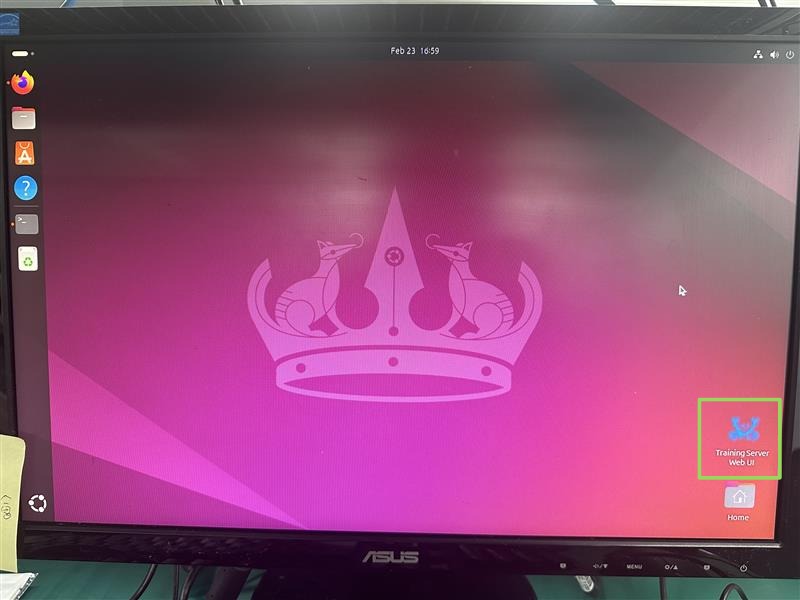
System login interface
On the model training interface, log in with the default credentials:
Username:
admin@realtek.comPassword:
admin123
You can change the password after logging in.
The system supports multiple user accounts, with each account having its own workspace. However, only one training job can run at a time due to the limitation of a single NVIDIA GPU.
AI Training Server Run Guide
The AI Training Server supports a complete workflow, from managing your own data, to simulation testing, and finally to on-device testing.
R1. Log into the Server
Ensure you have access to the server and log in with the appropriate credentials.
R2. Start the Training
Once you have successfully logged into the server, you can:
Upload your own dataset or download example datasets from Hugging Face.
Adjust the training configuration.
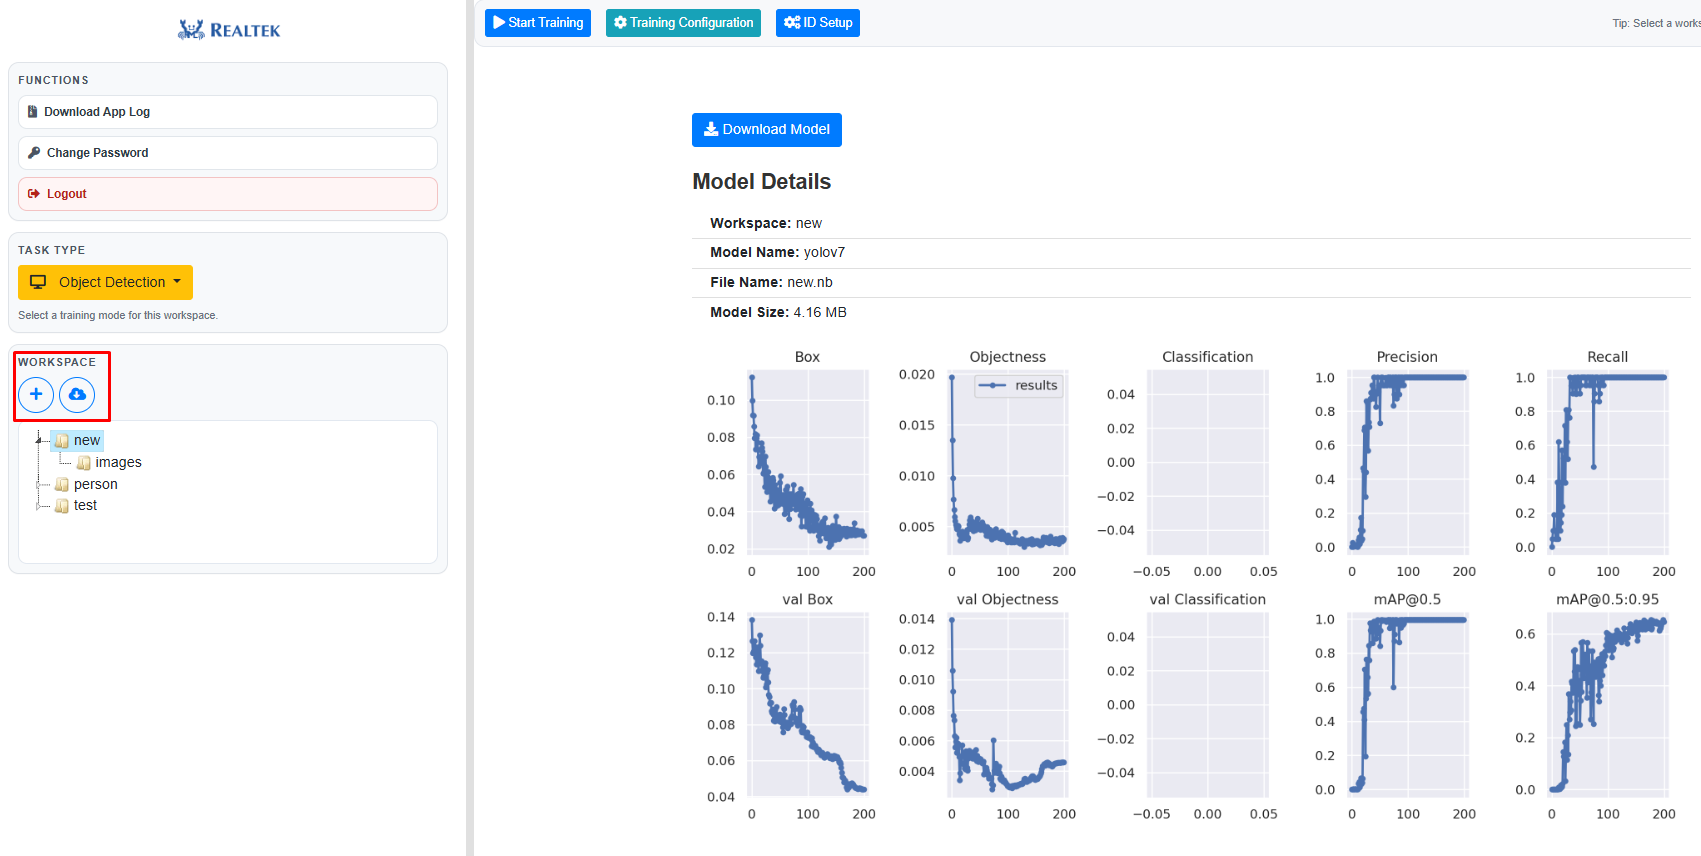
Importing dataset
Labels for the dataset can be generated automatically.
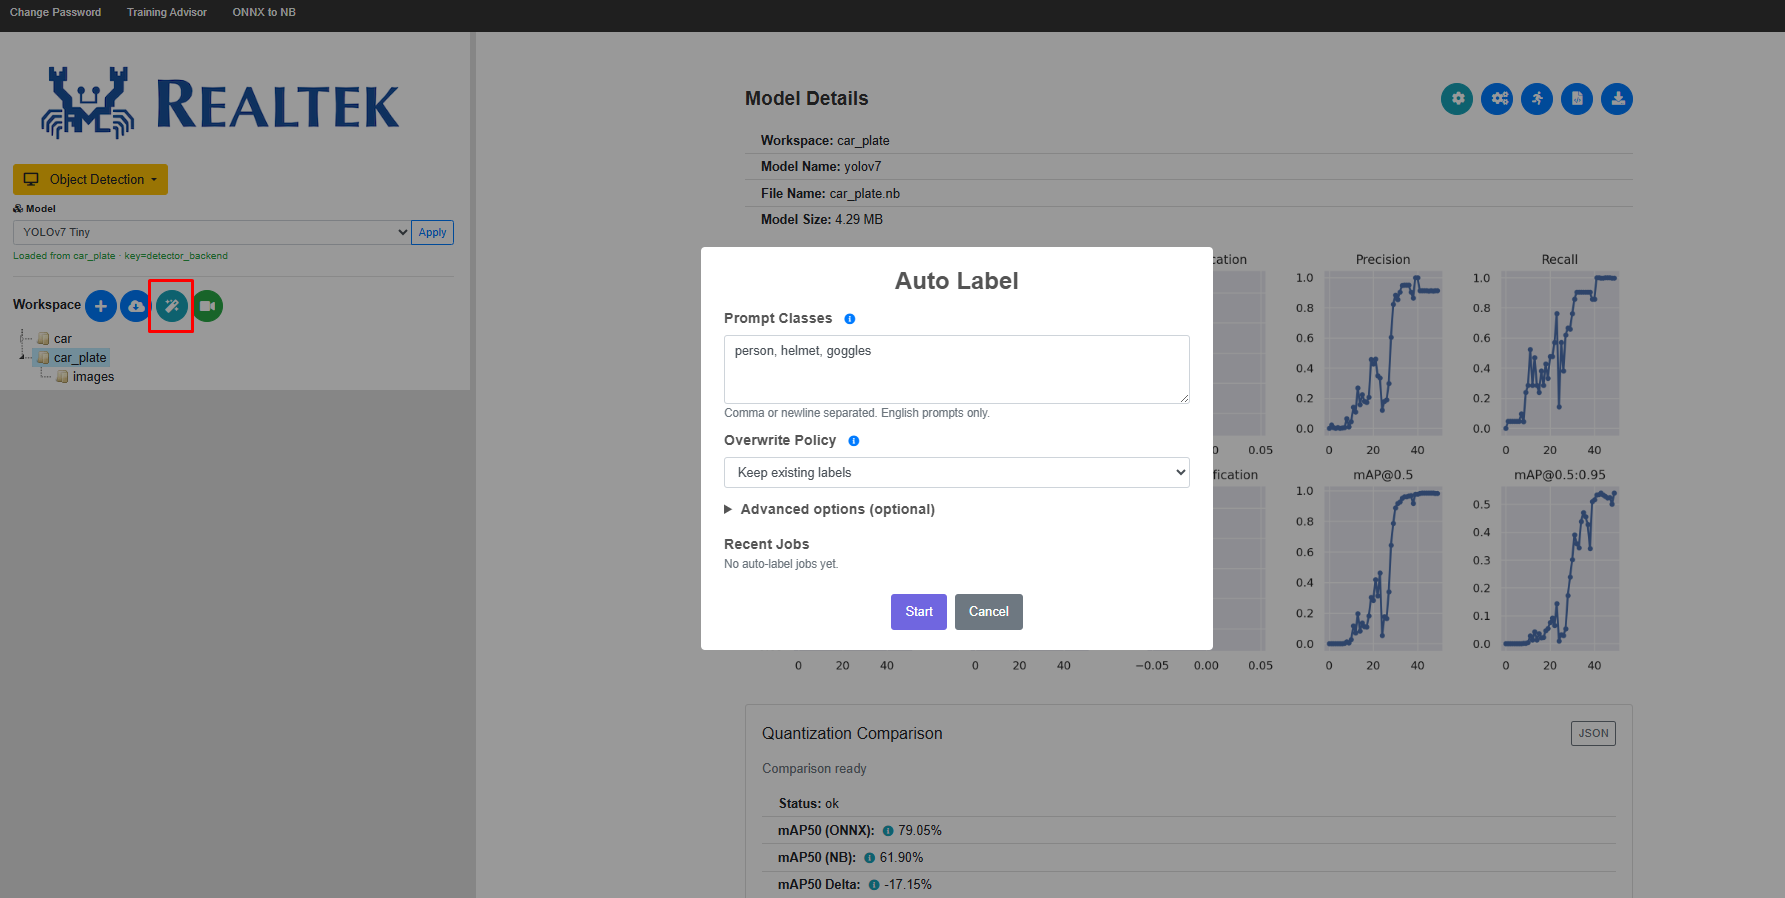
Auto labelling
Image classification training displays the loss curve, while object detection shows the training progress.
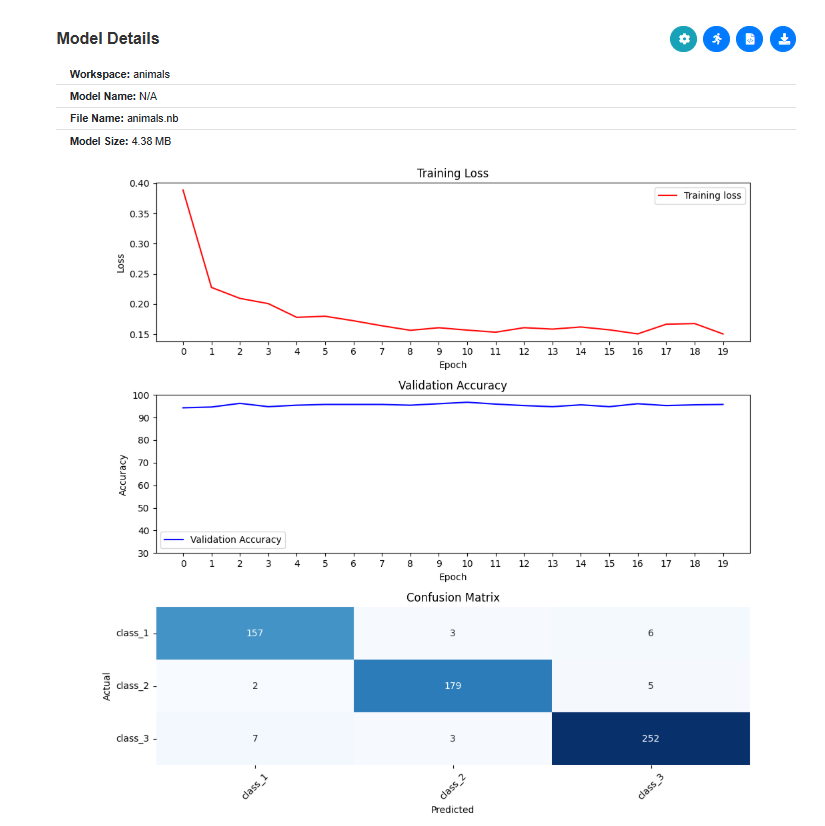
Image classification display loss
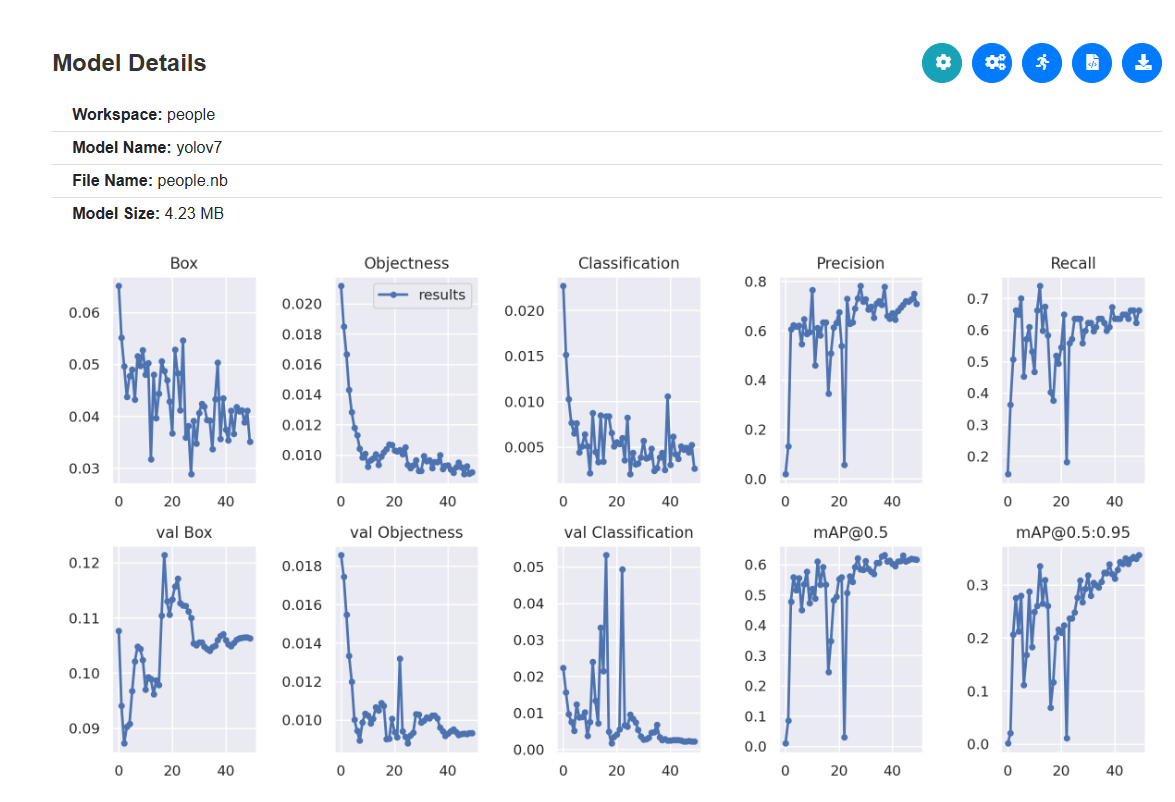
Object detection display training progress
The tool provides a before-and-after comparison of the model during quantization (FP32 to INT8). You can also download the trained ONNX and NB files for further manual comparison if needed.
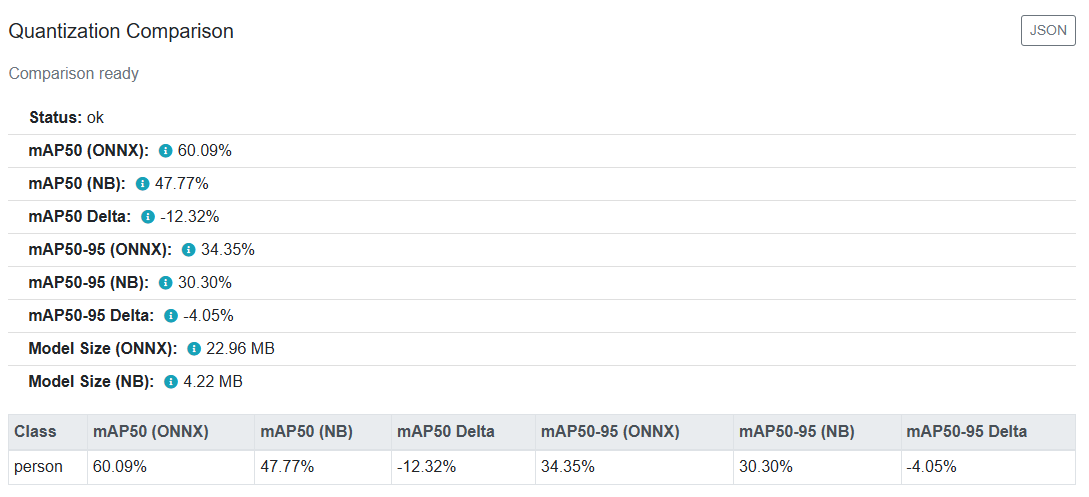
Quantization Comparison
You can define and manage classes directly in the UI. To recognize new objects, simply add a new class, and the system will automatically include it in the training process.
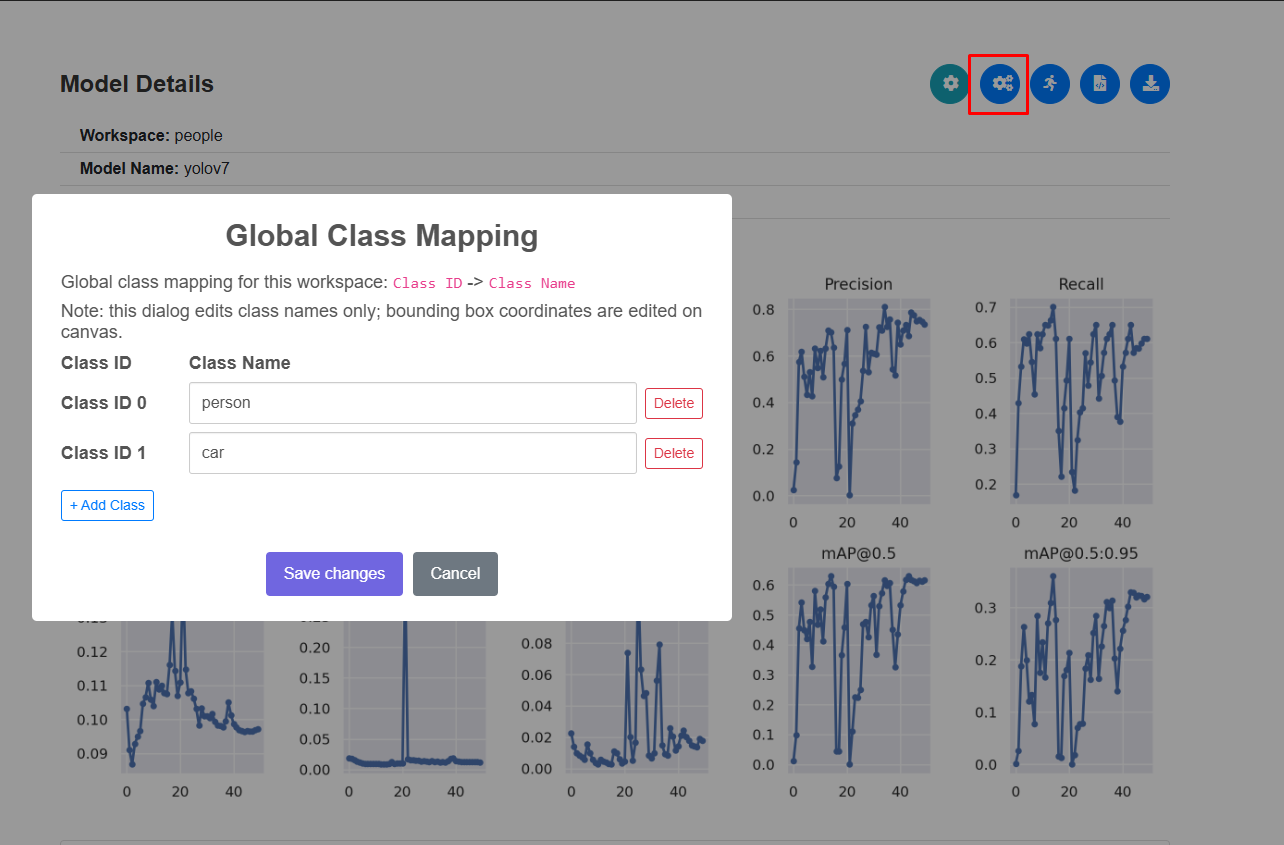
Add new class
Note
Theoretically, because the initial starting weights are random, it is highly unlikely for the model to converge to the exact same result across runs. However, increasing the number of epochs reduces result variability. In practice, training is typically run multiple times.
R3. Download the Model
When the training is completed, a Download button will appear. Click this button to download the trained model, which you can use on RTL IC chip.
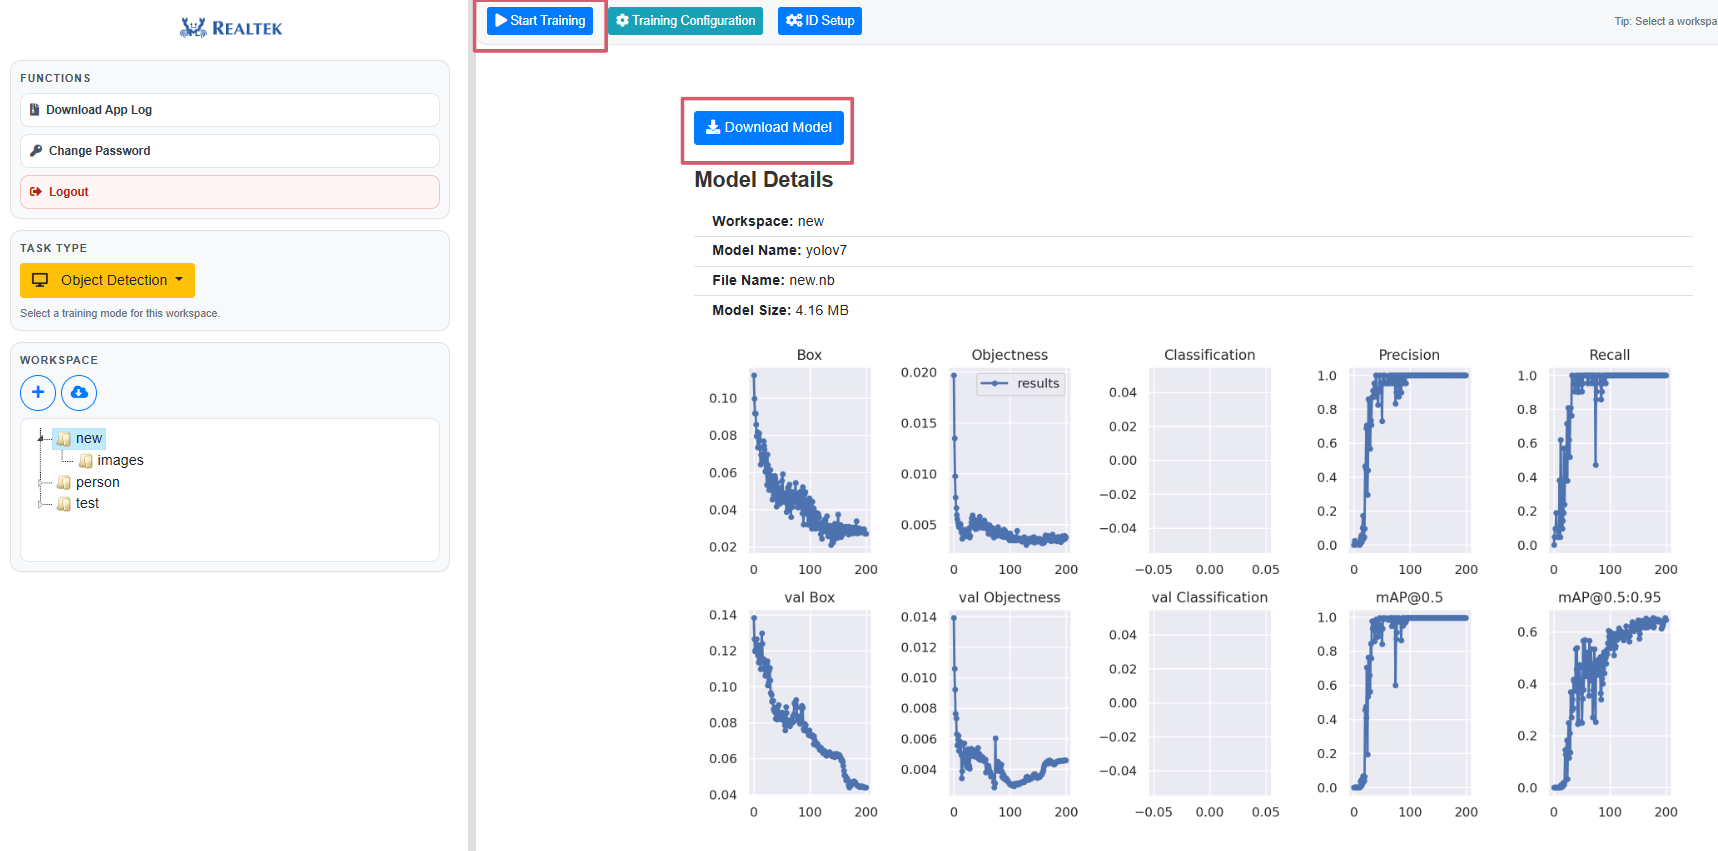
‘Run’ and ‘Download Model’ buttons
Note
Currently, Hugging Face integration is mainly intended for initial testing. Uploading locally trained models for quantization and deployment is not yet supported, but this feature is planned for future development.
R4. Model Testing
After the training is complete, the tool features a built-in simulator that allows you to directly observe the results and evaluate the model.
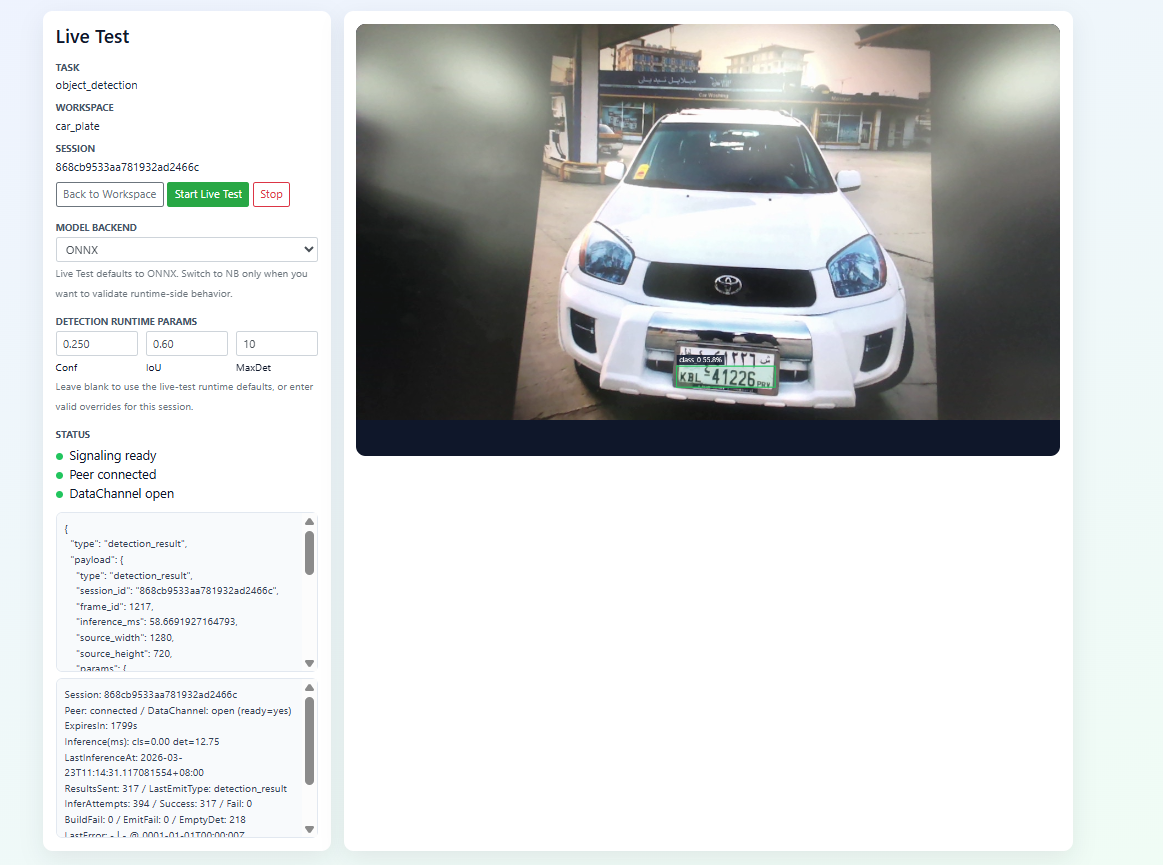
Live test