Environment Setup
Download and Install Arduino IDE
Go to the Arduino official website and download the installer for your operating system: Arduino IDE
Note
If the download speed is slow or fails, you can visit the Arduino Chinese Community to download the installer from their cloud storage.
Run the installer. It is recommended to use the default settings during installation, and choose an English-only path for installation.
Note
An installation path containing non-ASCII characters may cause unexpected issues.
Get Familiar with Arduino IDE
The Arduino IDE interface is shown in the figure below:

Configure Arduino IDE (Optional)
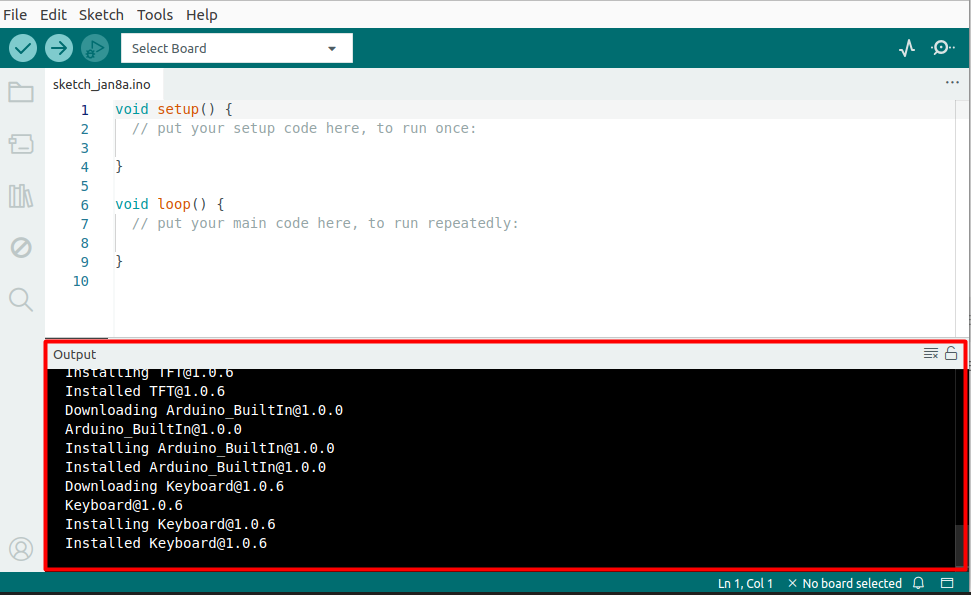
On first launch, the IDE may automatically download and install Arduino built-in core libraries and drivers. If the operating system prompts for driver installation or network security warnings, it is recommended to allow them. During this process, the output window will display download and installation messages, as shown below. This is normal — just wait for the installation to complete, no action required.
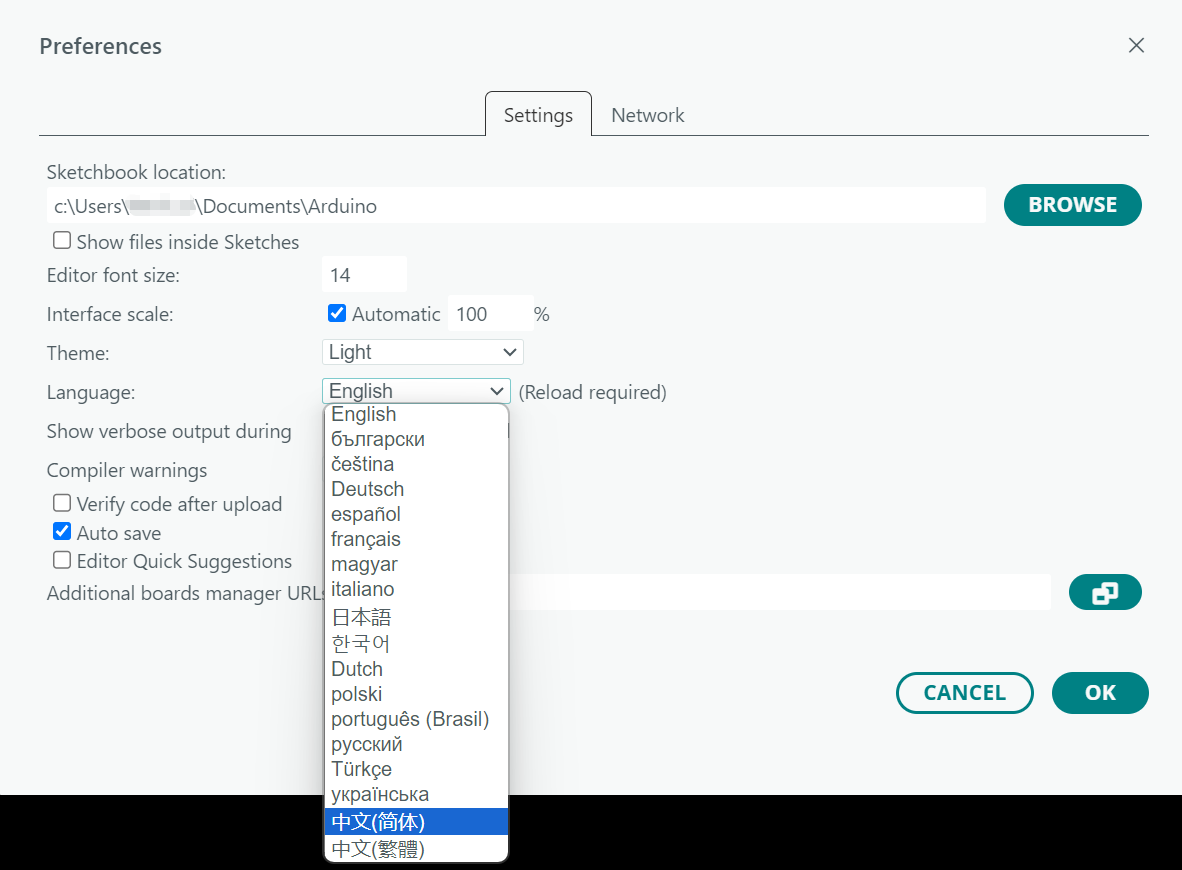
Arduino IDE displays in English by default but supports switching to Chinese. Click to open , set to , then click , as shown below. Arduino IDE will automatically restart and switch to the Chinese interface.
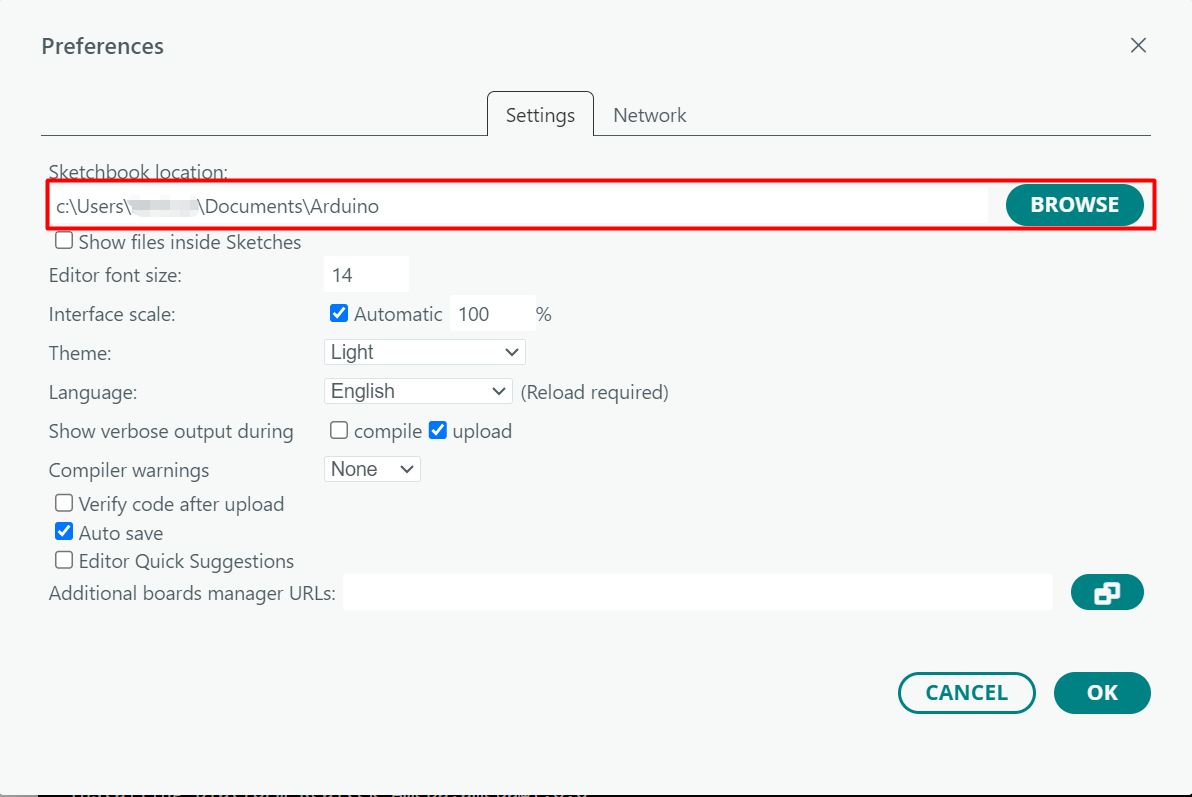
To change the sketchbook folder path, go to and modify the , as shown below.
In addition, you can also configure font size, interface zoom, theme style, verbose output, and more.
Install Ameba Boards Package
To develop on Ameba boards using Arduino IDE, you need to install the Ameba boards package.
Note
If installation through Arduino IDE fails, you can try manual installation.
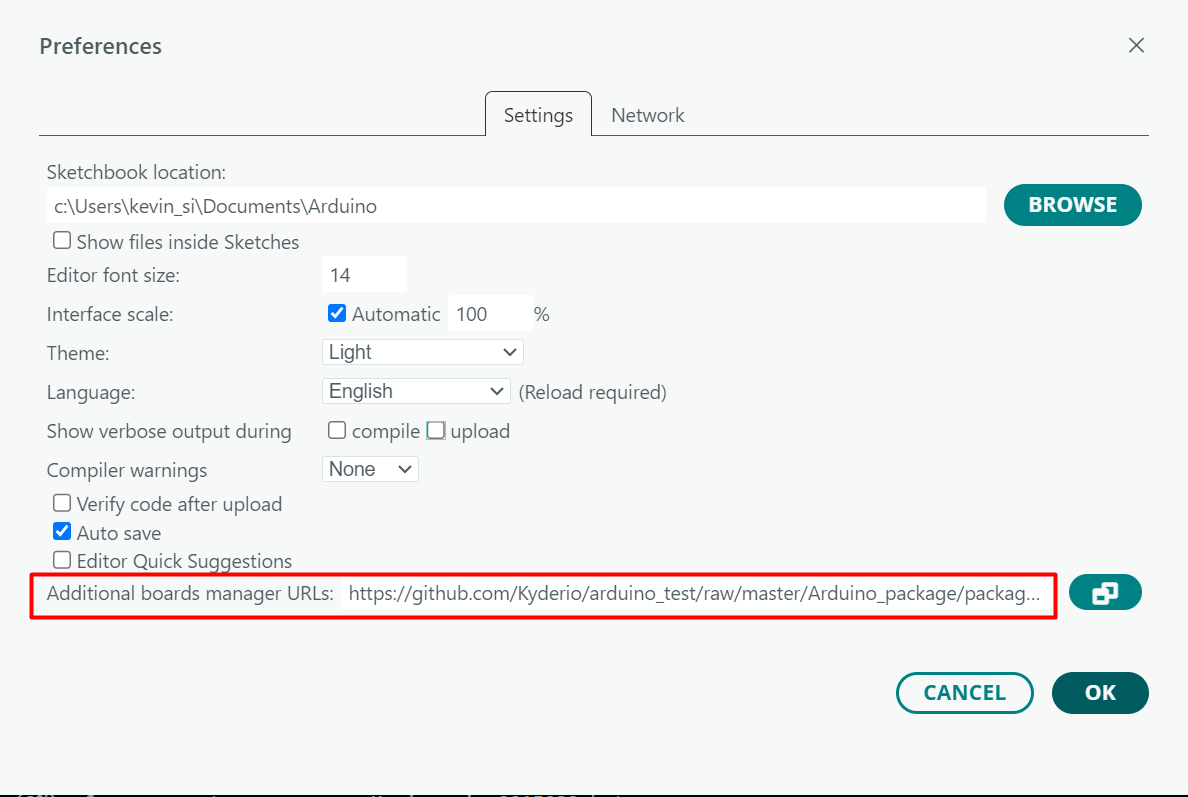
Open Arduino IDE, click , and paste the following URL into the Additional boards manager URLs field:
https://github.com/Kyderio/arduino_test/raw/master/Arduino_package/package_realtek_test_index.json
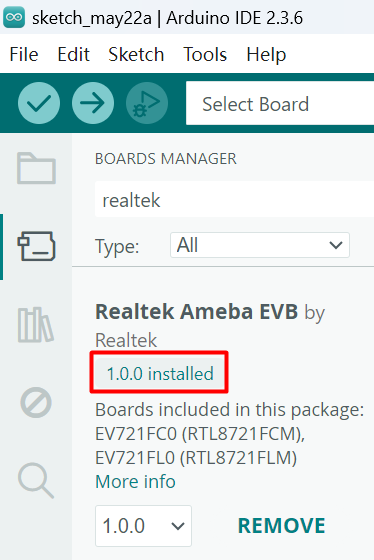
Go to or click the on the sidebar. Enter realtek in the search box, find Realtek Ameba EVB from the search results, select the desired version from the dropdown menu, and click INSTALL, as shown in the figure below. Arduino IDE will start downloading and installing the required files.

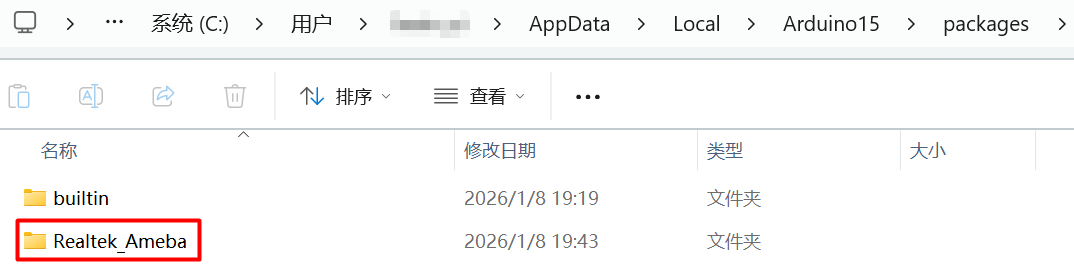
Open the directory shown below and check if there is a Realtek_Ameba folder. If so, delete it.
C:\Users\<username>\AppData\Local\Arduino15\packages\
~/.arduino15/packages/
~/Library/Arduino15/packages/
Open Arduino IDE, click , and paste the following URL into the Additional boards manager URLs field:
https://github.com/Kyderio/arduino_test/raw/master/Arduino_package/package_realtek_test_index.json
Download the offline package.
Clone the GitHub repository, or visit the GitHub repository to download and unzip the source package into the directory shown below:
C:\Users\<username>\AppData\Local\Arduino15\packages\
~/.arduino15/packages/

~/Library/Arduino15/packages/
Reopen Arduino IDE, go to the Boards Manager, and confirm that Realtek Ameba EVB has been installed, as shown in the figure below:
Select Board
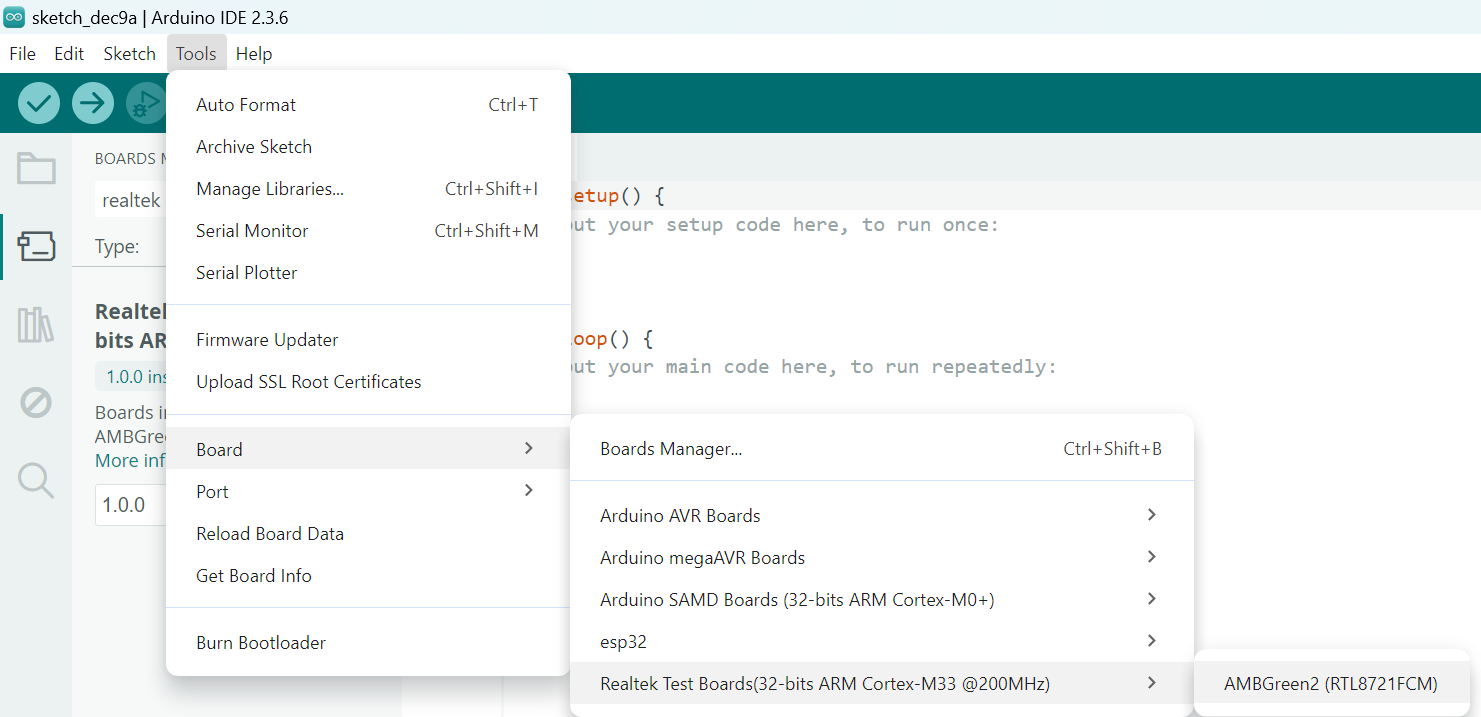
After the boards package is installed, select the board (e.g., EV721FC0) via , as shown below:
Install Libraries (Optional)
An Arduino “Library” is a collection of code that encapsulates specific functions, allowing reuse across multiple projects and avoiding the need to rewrite complex code. Libraries typically include specialized algorithms, hardware drivers, communication protocols, and other functional modules. Developers can call them directly to quickly implement features such as sensor control, screen display, and network communication. All libraries can be found in the Arduino Libraries Reference.
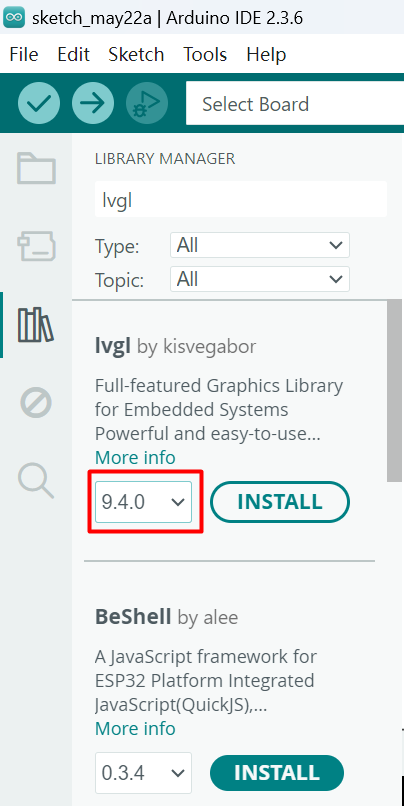
In the menu bar, click or click the on the sidebar.
Enter the library name in the search box. Related libraries will appear in the search results. Check the description and author information of the library to find the one you need. Select the desired version from the dropdown menu, and click INSTALL, as shown in the figure below:
Arduino IDE will automatically create a libraries folder under the sketchbook folder to store the downloaded libraries. To change the storage location, please refer to Change sketchbook folder.
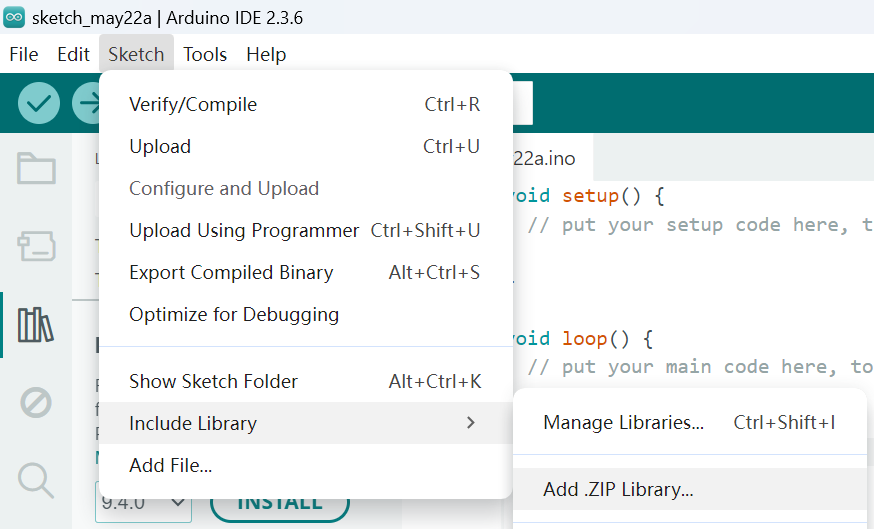
In the menu bar, click , as shown in the figure below:
In the file selection dialog that pops up, locate and select the downloaded .zip library file, then click Open.
Arduino IDE will automatically create a libraries folder under the sketchbook folder and automatically extract the .zip library file into it. To change the storage location, please refer to Change sketchbook folder.
Download and extract all files of the required library, then place them in the libraries folder under the sketchbook folder.
Note
If there is no libraries folder under the sketchbook folder, you need to create it manually.
Restart Arduino IDE and confirm that the required library has been installed.
Hardware Environment Setup
Ameba boards adopt a multi-functional composite interface design that integrates power supply, program upload, and log printing into a single interface, greatly simplifying hardware connection. Check the corresponding Boards Guide to confirm the location of the USB Type-C interface. Connect the board to the computer via a USB Type-C to Type-A cable.
Note
If this is the first time the board is connected to the computer, the USB driver will be installed automatically. If you encounter driver issues when connecting the board to the computer, please install the USB driver manually.
Before uploading a program, the Ameba board needs to enter upload mode. Entering upload mode requires operating the DOWNLOAD button and the CHIP_EN button. Check the corresponding Boards Guide to confirm the button locations.
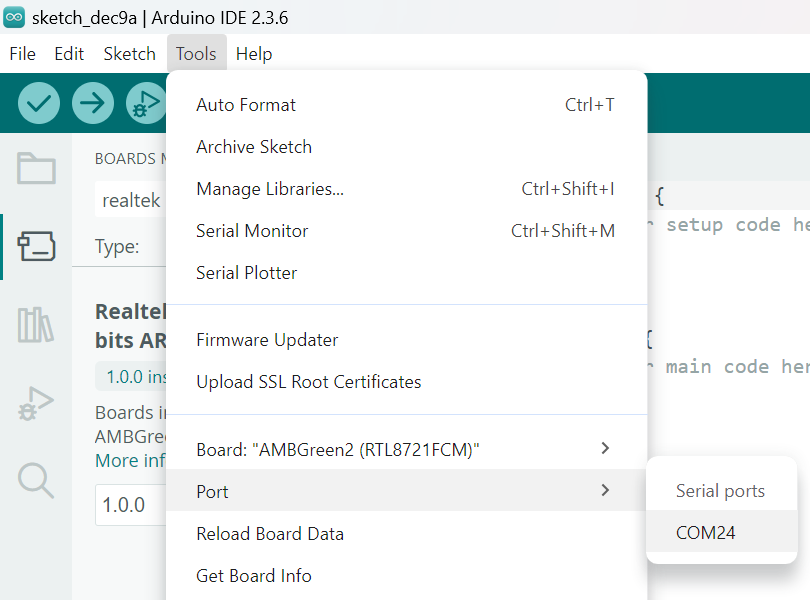
Setup Port
Click , and select the corresponding port from the dropdown menu, as shown below: