Customized AI Model Installation Guide
After the AI model conversion and successful gets the .nb file, please refer to the following steps to apply into Arduino SDK.
Rename the customized .nb files
Objects Detection |
|
Face Detection |
|
Face Recognition |
|
Audio related |
|
Copy/Replace “.nb” file into the project folder
C:\Users\<USERNAME>\AppData\Local\Arduino15\packages\realtek\hardware\AmebaPro2\<VERSION>\libraries\NeuralNetwork\examples
Or user customized project folder with
.inofile.
\home\<USERNAME>.arduino15\packages\realtek\hardware\AmebaPro2\<VERSION>
\libraries\NeuralNetwork\examples
Or user customized project folder with
.inofile.
\Users\<USERNAME>\Library\Arduino15\packages\realtek\hardware\AmebaPro2\<VERSION>\libraries\NeuralNetwork\examples
Or user customized project folder with
.inofile.
Compile and run examples
Open Arduino IDE and run AmebaNN example that related to the model transferred.
For specific model selection please refer to the example guide and API documents below.
Load Neural Network models via SD card
Open one of the Ameba Neural Network examples by navigating to File -> Examples -> AmebaNN Let’s take ObjectDetectionCallback as an example.
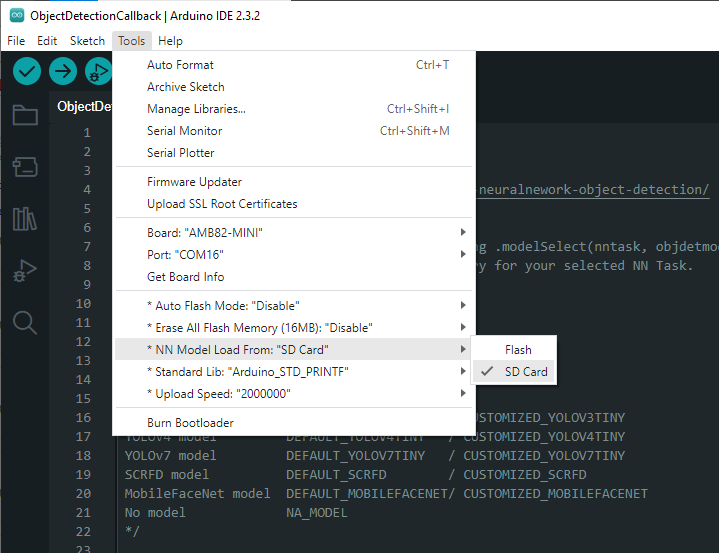
After opening the example on Arduino IDE, navigate to Tools -> NN Model Load from: select SD card as the option.
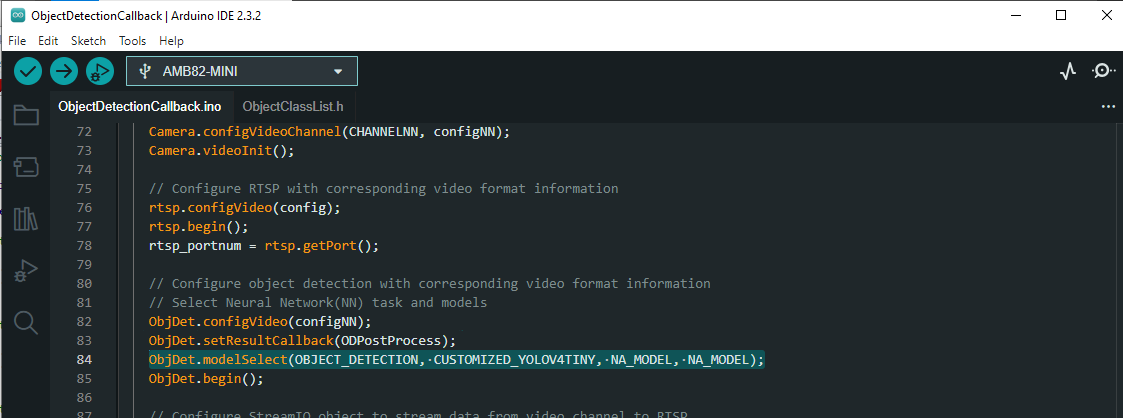
Next, in the code under modelSelect function, simply change from DEFAULT to CUSTOMIZED for the model used.
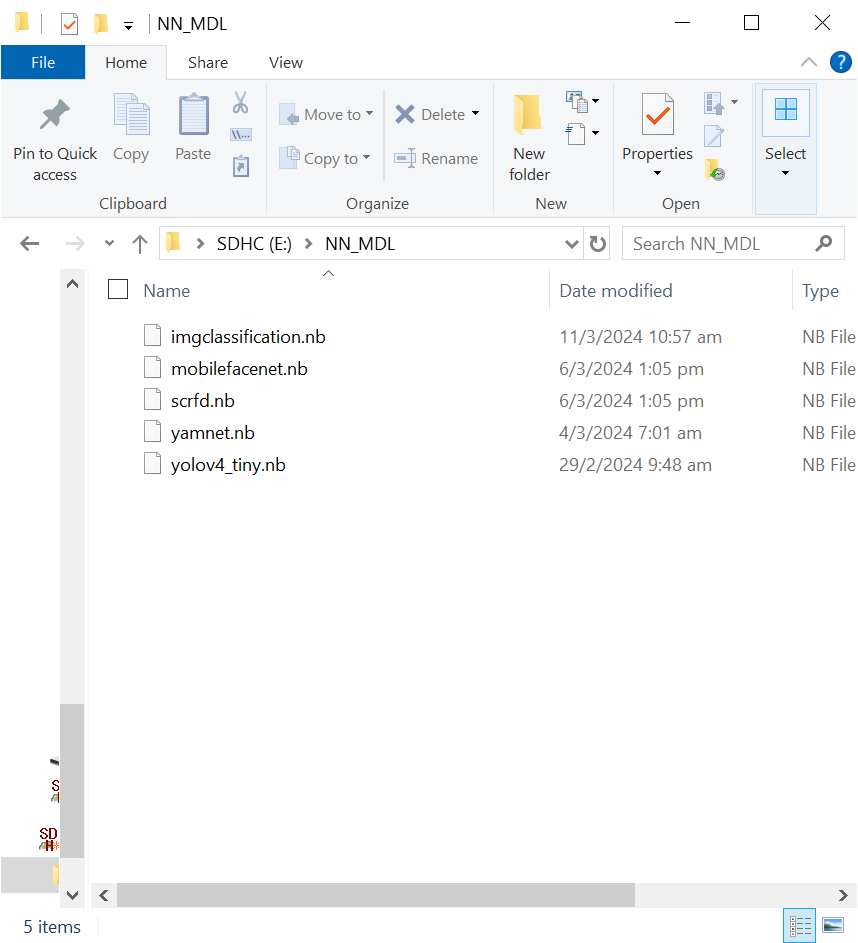
In the SD card, create a folder name NN_MDL and save your models in the folder by naming your models as stated below,

Objects Detection |
|
Face Detection |
|
Face Recognition |
|
Audio Classification |
|
Image Classification |
|
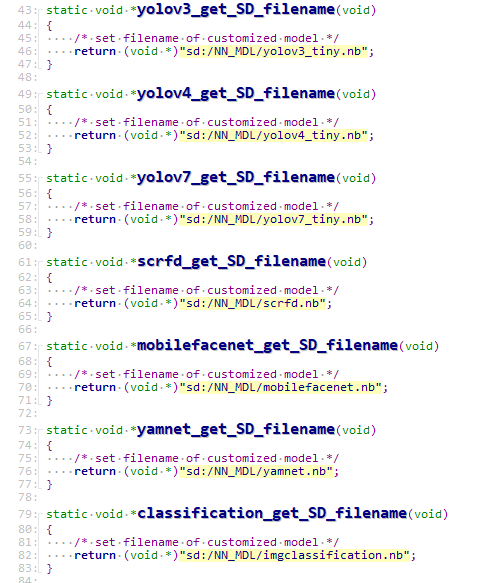
You can change to your preferred .nb file names in SD_Model.cpp by navigating to \Arduino15\packages\realtek\hardware\AmebaPro2\<SDK Version>\libraries\NeuralNetwork\src to match the name on your SD card if you would like to use a different name for the .nb file that is saved there.